I have had a lot of free time lately. Probably way to much, but whenever I get free time I always like to mess around with (and break) my computer trying to improve this and that. Well the other day I decided to try Chromium OS on my netbook to see how it ran, and well I like it. The netbook used for this test is a System76 Star1 with a Intel 5100 wifi card.
1: Making a bootable flash drive.
This is probably the hardest part of getting Chromium on a netbook. Because it is not released yet, you have to go to the project page and build it yourself, which franly takes a while, so if you build it from source, I recommend your computer has some real horse power behind it. BUT, even if you don't have a super powerfull pc, the time, skill, or will to build it from source, Hexxeh has been kind enough to host nightly builds for us! You can grab one over at http://chromeos.hexxeh.net/vanilla.php As of right now, and nightly build built after 8-17 fails to display anything on the screen, so you should grab one older than that if you want to test it. Hexxeh also overs a modified version of chromium that he calls Flow. It is not as bleeding edge, but it supports more hardware and is more stable. His site covers everthing you need to make a bootable flash driver, so I'm not going to cover that here.
2: First boot!
On my first boot from the usb, I was impressed. It took about 15 seconds to boot from when I pressed power, and I was greeted with a screen asking me to connect to a local network then into my Google account. Unfortanlly I was unable to grab a screen shot of that, so you will have to see for youself what that looks like. Installing chromium to my netbook was a little tricky because I didn't want to blow my current archlinux install away, but if you only want chromium on your netbook, it is a very easy install, just one command from command line. (It WILL format your hard drive and you WILL lose data if your not careful)
3: Second boot!
Once chromium was installed on the computer, it booted in about 9 seconds, which is very good considering my computer was not built to run chromium. This time I did not need to choose my local network, and my username was already filled in for me. But enough about installing and booting it, lets get down to the good stuff.
4: The Pros:
Chromium OS booted lightening fast and got me online in seconds. After loging in, you are greated with the chromium browser and the web at your finger tips. One thing that I really liked was that when I went to open my Gmail, I was logged in already because I had used the same google account to sign into the OS. Overall web page viewing was fast and stable, with things like youtube and HTML5 working flawlessly. I was able to edit files online with Google Docs, and even play music with a neat little program called AudioBox (Next weeks blog). The browser is stable enough to do anything I wanted online, and I am even writing this post on it.
5: The Cons:

Any OS and every OS has its flaws, and for being a developer build of Chromium, it has surprisingly few. The biggest problem I had with it was being unable to find the shutdown button. I can't find one anywhere in the GUI and pressing the hardware power button didn't do a thing, so to power it off I had to login, press crtl - t, type shell, then sudo poweroff. It was not to big an issue for me, because that is normally how I turn my computers off, but it is kinda of a lengthly process just to turn it off. Another gripe of mine was trying to take screenshots for this blog! It took some googling to find out that once you press the PrtSc button, that a screenshot is saved, (with no feedback given) to /home/chronos/user/screenshots. Its not a big deal but knowing that a screenshot was taken correctly is normally nice.
I'm not really sure if this one counts as a con really, its more of a missing feature, but you can't yet print with Chromium OS. Printing using Google Cloud print is moving along, but with no way to add a printer, it is really kinda useless. As you can see, the list is printers is, well empty.
5: Hardware support:
So for Chromium has supported my netbook very well. All of my leds work, my sound works, and even my webcam works out of box. One thing I did notice however, is that even though my wireless card supports Wireless N, the driver used my Chromium does not seem to support it. As a test I swapped out my Intel card with the Realtek card that came with it, and I was shocked. I was able to connect to my Wireless AP from my room flawlessly, something that I just can't get to work with any other distro.
6: Overall
This is quickly becoming my primary OS for my netbook. Its fast boot to web gets me where I'm going and really just gets the job done. No fancy bells and wisells that I don't need, just chromium. If you have a netbook and all you really do is surf the web, I encourage you to grab a spare flash drive, download a hexxeh build and test this puppy out. It is really a lot of fun. If you got any questions just email
[email protected] or leave a comment!
 Any OS and every OS has its flaws, and for being a developer build of Chromium, it has surprisingly few. The biggest problem I had with it was being unable to find the shutdown button. I can't find one anywhere in the GUI and pressing the hardware power button didn't do a thing, so to power it off I had to login, press crtl - t, type shell, then sudo poweroff. It was not to big an issue for me, because that is normally how I turn my computers off, but it is kinda of a lengthly process just to turn it off. Another gripe of mine was trying to take screenshots for this blog! It took some googling to find out that once you press the PrtSc button, that a screenshot is saved, (with no feedback given) to /home/chronos/user/screenshots. Its not a big deal but knowing that a screenshot was taken correctly is normally nice.

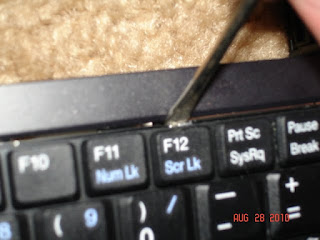
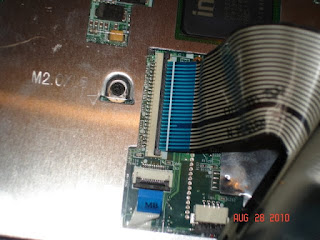
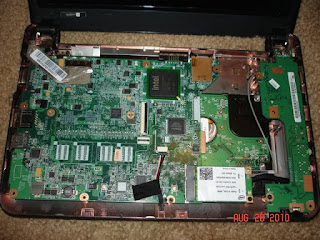
 Step Four: Removing the upper casing
 Step Five: Removing and upgrading the wireless card.
 Congratulations! If everything went well, your netbook is online with your new wireless card. If not, leave a comment or email me at [email protected] and I'll see what I can do, but remember, you rebuilt your netbook at your risk, so please don't email me if you didn't read the whole guide or chose to ignore something. Any emails insulting me or yelling at me for breaking their computer will get forwarded to my automatic mail sorting program, /dev/null. Thanks for reading this how to, and enjoy you upgraded wireless ability!